

Peeling a wrap feels risky when you care about your paint. This guide shows how to remove vinyl wrap from a vehicle safely. You learn trusted steps, tools, and simple techniques that protect surfaces.
Many people fear scratches, residue, and costly repaint work later. However, correct vinyl wrap removal keeps paint smooth and intact always. You only need patience, proper heat, and the right removal approach.
This process works for old wraps, fresh wraps, and partial panels. It also helps installers and owners how to take off car wrap. Let us have all the things broken down in clear, straight forward steps that you can believe in.
What You Need Before You Start
Begin with the correct arrangement in order to avoid damage and waste time. Proper planning enhances the safety and speeds up the removal process. Follow a trusted vinyl wrap installation guide mindset before starting work.
Clean workspace and proper lighting allow you to be able to see each edge clearly. High temperatures also contribute to the fact that the adhesive is easier to remove since it softens. Stay away from cold weather since it brittle the film and is difficult to peel.
Gather all tools before starting to prevent stopping midway. A smooth workflow reduces mistakes and protects your vehicle paint. Preparation always decides how easy your vinyl wrap removal becomes.
Essential Tools for Safe Vinyl Wrap Removal
You need a few basic tools for safe and clean removal work. Always use tools designed for wraps to avoid scratches and damage. A proper wrap removal tool gives better control than sharp objects.
- Heat gun for softening adhesive layers during removal
- Plastic squeegee or lift tool for gentle peeling control
- Microfiber cloths for safe cleaning without surface scratching
- 70% IPA solution to remove car wrap adhesive effectively
- Panel cleaner spray for final surface preparation stage
Using correct tools keeps paint safe and speeds up removal time. Avoid metal tools because they scratch surfaces and cause costly damage. Simple tools ensure the safe & smooth process for all users.
Step-by-Step: How to Remove Vinyl Wrap Safely
You can remove wrap safely by heating, peeling slowly, and cleaning carefully. This method answers exactly how to remove vinyl wrap from a vehicle safely. It is better to do everything step by step to preserve the paint.
Work panel by panel instead of rushing the whole vehicle removal. Small sections help you control heat and peeling angle better. Patience ensures clean results without tearing or adhesive buildup.
Use consistent heat, slow peeling, and steady pressure throughout the process. These three factors control successful vinyl wrap removal every time. Now follow each step clearly and carefully for best outcome.
Step 1: Heat the Film
Heat softens adhesive and allows easier film removal without resistance. Use a proper heat gun for vinyl wrap at controlled temperature. A heat gun set to 50–60°C is sufficient for safe removal.
Move heat evenly across the panel without focusing on one spot. Too much heat damages paint and weakens the clear coat layer. Keep distance steady and move continuously during the heating process.
Warm the edge first before starting to peel the film. Soft edges allow easier lifting without tearing the vinyl layer. Correct heating always makes peeling smoother and safer overall.
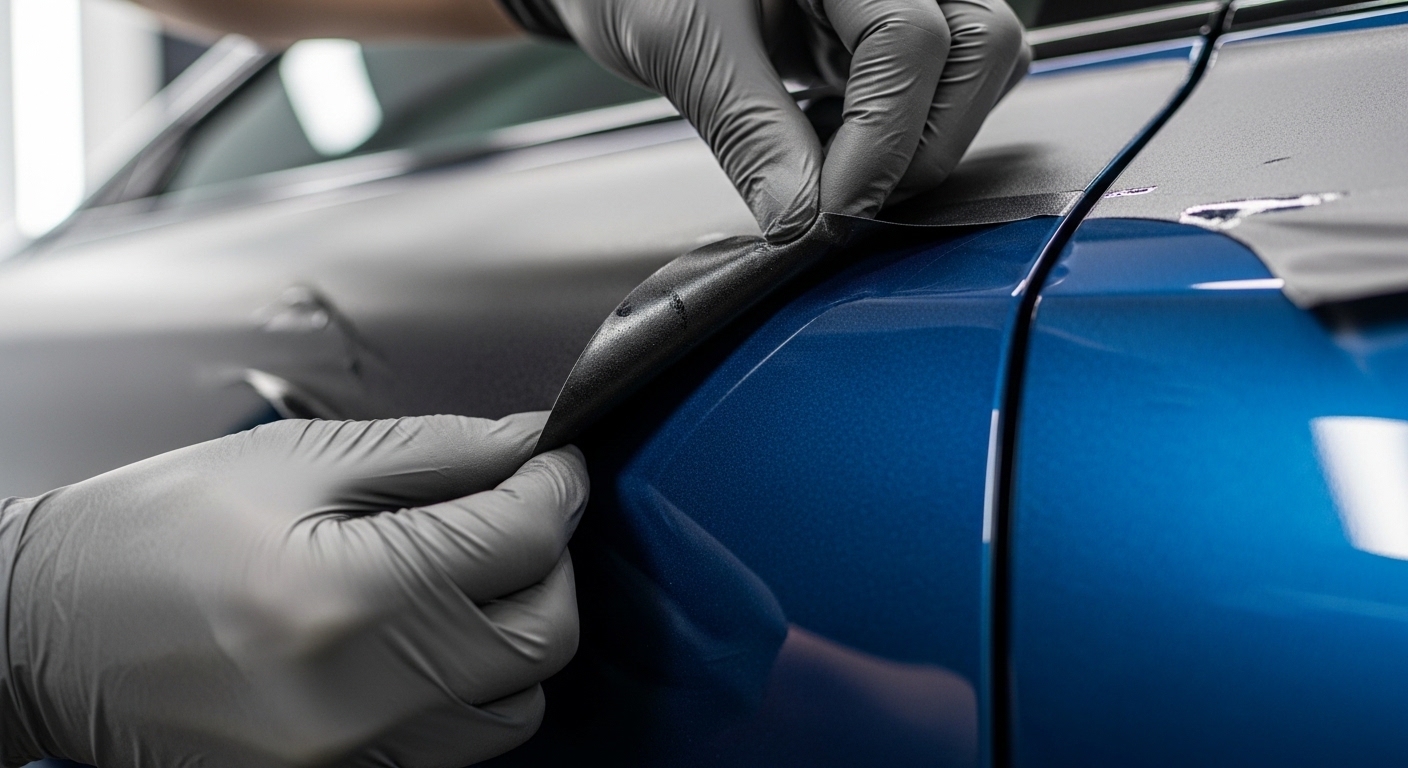
Step 2: Peel at the Correct Angle
Peel slowly using a low angle to protect the paint surface. Peeling at a 15–20 degree angle reduces paint damage risk. This method works best for safe ways to take off car wrap results.
Avoid pulling upward because it stresses the adhesive bond strongly. Low angle peeling keeps tension even across the film surface. Steady pulling avoids tearing and uneven removal across panels.
Work in small sections and never rush the peeling process. Slow removal protects both vinyl and paint underneath layers. Control always matters more than speed during wrap removal.
Step 3: Remove Adhesive Residue
There is also some glue left behind after peeling and it requires cleaning. You must fully remove car wrap adhesive before final finishing. Leftover residue attracts dirt and affects new wrap bonding later.
Apply 70% IPA solution using a clean microfiber cloth gently. The IPA solution removes adhesive safely without harming the clear coat surface. For smooth results as well as even cleaning, work in small circles.
Wipe again and again until there is no spot left on the surface. Do not use harsh chemicals which can spoil the paint or plastic trim. The proper cleaning prepares the surface for polishing or installation of new wraps.
Step 4: Final Surface Clean
Final cleaning makes sure that the surface is prepared for next steps. Use panel cleaner spray to remove oils and remaining particles. This step completes the full vinyl wrap remover process safely.
Wipe gently using microfiber cloths without applying strong pressure. Check edges and corners where residue often hides unnoticed. A clean surface prevents issues during repaint or rewrap projects.
Inspect the paint under bright light to confirm perfect condition. Clean surfaces reflect light evenly without streaks or marks visible. Final cleaning ensures your vehicle looks fresh and ready again.
How Long Has the Wrap Been On? Why It Matters
Wrap age directly affects how easy removal becomes for installers. Vinyl wrap applied over five years bonds stronger with paint surfaces. Older wraps need more care during vinyl wrap removal processes.
A full vinyl wrap removal on a car takes two to four hours. Complex panels and aged wraps may require extra time and effort. This timing helps plan work and avoid rushed removal mistakes.
Use guidance from a trusted cast vinyl film guide for better results. Newer wraps peel easily while older ones need controlled heat application. Knowing wrap age helps you adjust technique and avoid damage.
When to Remove Vinyl Wrap Yourself vs Hire a Professional
Many owners remove the wraps themselves with basic tools and patience. Simple panels and newer wraps are easier for home removal projects. This approach works well for basic vinyl wrap removal jobs.
The complex vehicles, the old wraps, or the areas with broken paints need professional assistance. Experts handle tricky edges and reduce risk during the removal process. They also ensure no paint lifting or adhesive damage occurs.
Choose based on your confidence, tools, and wrap condition carefully. DIY works for many cases but professionals handle sensitive situations better. Costly mistakes are avoided by making smart choices that save your car paint job.
Does Vinyl Wrap Damage Paint When Removed?
Vinyl wrap does not damage paint when installed and removed correctly. TeckWrap cast vinyl removes cleanly without harming properly prepared paint. This fact answers concerns about how to remove vinyl wrap from vehicles safely.
Improper installation or damaged paint may cause peeling issues later. Old wraps over five years may bond stronger and need careful removal. These conditions increase risk if handled without proper technique.
Correct heat, angle, and cleaning ensure safe removal every time. Following steps reduces risk and protects paint from any damage. Good practice always leads to clean and safe wrap removal.

What to Do If Adhesive Residue Remains
In some cases, a residual would be left after the peeling process and requires additional cleaning measures. This situation is common in older wraps and high heat exposure areas. You must fully remove car wrap adhesive before finishing the process.
Apply 70% IPA solution and clean using microfiber cloth gently. IPA removes residue without damaging paint or clear coat layers. Work slowly to avoid spreading glue across larger surface areas.
Clean again to feel a smooth and clean surface. One should not use harsh chemicals or rough tools in this process. Proper cleaning ensures safe preparation for new wrap installation.
Final Step: Start Your Next Wrap Project
You now understand safe removal and proper preparation for new wraps. Clean surfaces always improve bonding and final wrap appearance quality. Upgrade today using trusted replacement vinyl wrap film for best results.
[Choose quality materials and start your next wrap with confidence]
Frequently Asked Questions
How do you remove vinyl wrap from a car without damaging the paint?
You can remove the wrap safely by heating, peeling slowly, and cleaning carefully.
What temperature should a heat gun be set to for vinyl wrap removal?
A heat gun set to 50–60°C is sufficient for safe removal.
How do you remove adhesive residue after taking off a car wrap?
Apply 70% IPA solution using a clean microfiber cloth gently. The IPA solution removes adhesive safely without harming the clear coat surface.
Does removing vinyl wrap damage car paint?
Vinyl wrap does not damage paint when installed and removed correctly. TeckWrap cast vinyl removes cleanly without harming properly prepared paint.
What tools do you need to remove vinyl wrap?
You need a heat gun, plastic squeegee or lift tool, microfiber cloths, and 70% IPA solution.
Can you remove the vinyl wrap yourself, or do you need a professional?
Many owners remove the wraps themselves with basic tools and patience. The complex vehicles, the old wraps, or the areas with broken paint need professional assistance.
How long does it take to remove vinyl wrap from a car?
A full vinyl wrap removal on a car takes two to four hours. Complex panels and aged wraps may require extra time.