


You might have seen car wrap videos online that look super easy and fast. So, is it hard to wrap a car? Yes, it is, especially for beginners with no experience. Wrapping a car needs focus, patience, and skill. It’s not just about placing vinyl on your car. A lot goes into it: cleaning, measuring, cutting, heating, and sealing every edge. Even small mistakes can ruin the look.
DIY car vinyl wrap kits are available today, but they still need proper knowledge and tools. A badly done wrap will peel, bubble, or look untidy within days. Professionals, on the other hand, offer flawless results backed by warranties.
What Makes Car Wrapping Look Easy (But Isn’t)?
Many people get inspired to try car wrapping after watching social media videos. But those short clips don’t show the full process. They skip steps that are hard to learn.
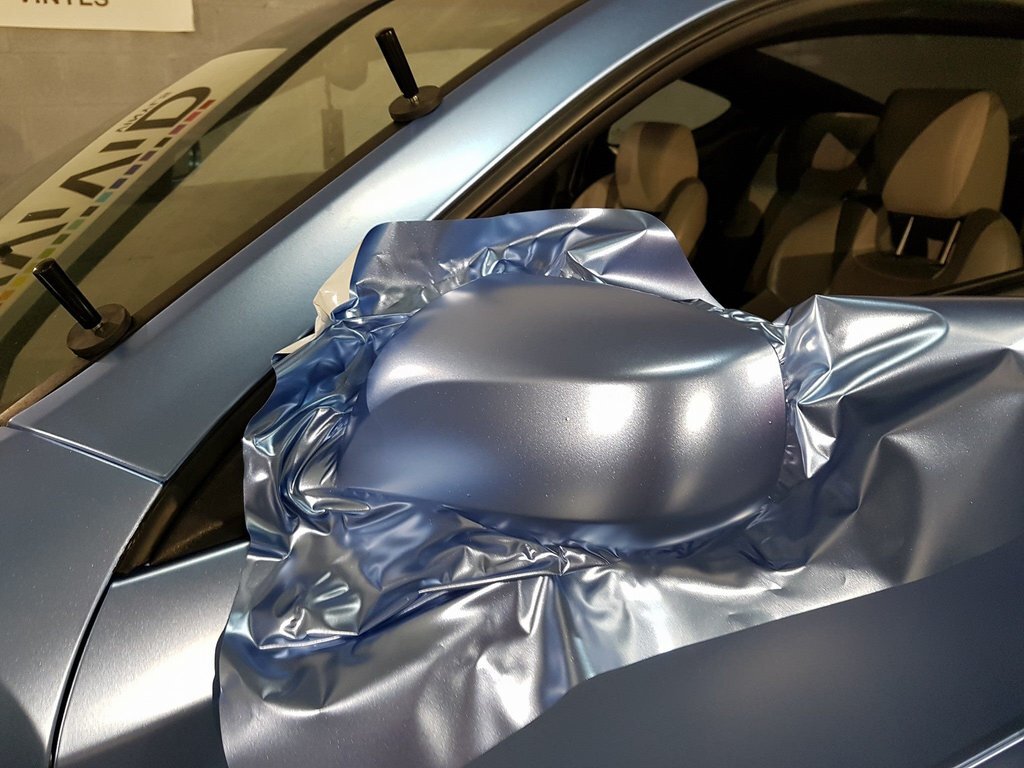
A tiny mistake in stretching or placing the vinyl can cause wrinkles. Even worse, air bubbles or misalignment can ruin the final look. It takes practice and steady hands to get it right.
Professional car wrappers took years to master tricky parts like curves and door handles. They also know how to work with tools and adjust wraps in tight spots. So, while wrapping may look easy, it truly needs skill and patience.
Step-by-Step Breakdown of the Car Wrapping Process
If you're wondering how to wrap a car, here’s a simple breakdown of the process. It helps to know the real effort behind a clean wrap job.
1. Surface Prep
Wash the car to remove dust and oil from every panel. Then, use a clay bar to smooth out hidden dirt for better vinyl bonding. Before placing the vinyl, wipe the surface with isopropyl alcohol to remove any remaining residue.
2. Measuring and Cutting
Measure each panel of your car correctly to ensure a perfect fit. Cut vinyl sheets with a few extra inches on all sides to allow adjustments. This step helps avoid material waste and prevents poor fitting during installation.
3. Panel Wrapping
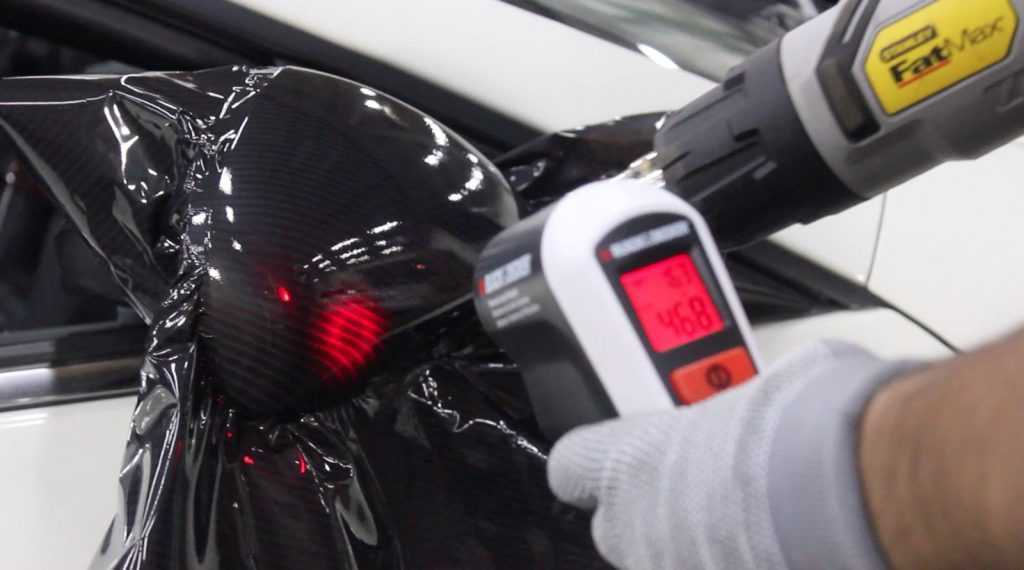
Use a heat gun to stretch and soften the vinyl before applying it. Apply the wrap using a felt-edge squeegee to remove bubbles as you go. This part takes time and accuracy, especially when working on curved or detailed areas.
4. Edge Sealing
Use pressure and heat carefully to seal every edge of the vinyl wrap. If you miss any edges, peeling may happen within just a few weeks. Sealed edges keep the vinyl secure and extend the lifespan of the wrap.
All these steps are critical in a proper car wrap installation guide. Skipping any step can ruin your entire work.
The Role of Environment in Vinyl Wrapping
Many people don’t think about the space they use for wrapping. But your surroundings make a big difference.
- The perfect temperature is between 20°C to 25°C.
- Avoid places with dust or wind while wrapping.
- Stay away from direct sunlight or high humidity during application.
Too much heat stretches the vinyl too much. Too little makes it hard to apply. A clean, indoor area with proper light and airflow gives the best results.
DIY Vinyl Wrap vs Hiring a Professional
You might think wrapping the car yourself saves money, and it does, sometimes. But is that enough?
Let’s see the car wrapping pros and cons of doing it yourself versus hiring a professional.
|
Type |
Pros |
Cons |
|
DIY Car Vinyl Wrap |
• More affordable if done correctly |
• Very steep learning curve for first-timers |
|
Professional Car Wrapping |
• Smooth and clean finish with no bubbles |
• Higher cost compared to DIY |
So, is it hard to wrap a car yourself? Yes, unless you're ready to spend time learning and practicing.
Essential Tools Needed to Wrap a Car
Before starting, gather all the right tools. These tools help avoid mistakes and speed up the job. Here are some must-have car vinyl wrap tools:
- Heat gun: Softens the wrap for easy bending.
- Felt-edge squeegee: Removes bubbles without scratching the vinyl.
- Precision knife: Trims excess wrap along edges.
- Wrap glove: Smooths vinyl with a better grip.
- IR thermometer: Checks vinyl temperature while heating.
- Knifeless tape: Cuts wrap without scratching paint.
- Air release tools: Help fix trapped bubbles.
Also, choose quality wrap material from trusted brands like TeckWrap UK. Cheap vinyl tears easily and has poor glue strength.
How TeckWrap UK Makes It Easier
TeckWrap UK knows that car wrapping can feel hard and even frustrating. That’s why TeckWrap UK creates wraps that are easy to use and professional-looking. Here’s what makes these wraps different:
- Bubble-release tech makes vinyl easier to apply and adjust.
- Flexible vinyl wraps well around curves and complex areas.
- Gloss, matte, carbon fibre, and chrome finishes suit all styles.
- Wraps are designed for both DIY car vinyl wrap and professional use.
TeckWrap UK supplies high-end vinyl wraps trusted by top UK wrappers. If you’re worried about car wrapping difficulty, start with these easy-to-handle wraps.
Final Thoughts
Wrapping a car is not just sticking vinyl on it. It takes prep, planning, the right tools, and skill.
Follow detailed car wrap preparation tips before starting. Choose proper tools and work in a clean environment. Understand the car wrapping pros and cons before deciding on DIY or professional help. Know that car wrap vs paint is a smart choice if you want lower costs and better flexibility.
Wrapping gets easier with practice. But with TeckWrap UK’s wraps, you don’t have to be an expert to get great results. These wraps are designed to help beginners and satisfy