


Car wrapping is increasing in the automotive market because it is the most effective way to access accessories and protect cars. This includes use of a vinyl film which covers the surface of the car and can serve two purposes: changing the appearance of the car or even serve as a layer that may protect the car paint.
This guide presents the right techniques that must be employed so as to achieve high quality and clean surface finishes for both the professional installer and the DIY homeowner. It is possible to get the maximum results in the given field using the proper tools, being aware of average issues, and knowing how to deal with them.
This is the most comprehensive vinyl wrap installation guide that you will ever come across and it will cover all essential aspects of a good wrap job.
Preparation for Vinyl Wrap Installation
Surface Energy: Key to Strong Adhesion
The stickiness of the vinyl to a particular surface is known as surface energy. It must be flat, free from defects and contaminants such as oils and dirt, if the adhesion is to be good. For surface preparation and removal of any grime or buildup, a gentle cleaner should be used. Sometimes there will be a need for a surface prep solution to increase the adhesion of the vinyl material. This phase is very important to reduce the chance of peeling or bubbling at a later date.
Maintain Climate Control: Temperature and Humidity Matters
The ability of the vinyl wrap to cling depends on the temperature and the humidity levels of the climate. To get the best outcome, work in a regulated environment. Vinyl wrap installation is best done in temperatures within a range of between 60°F to 80°F (15°C to 27°C) in colder months. If it becomes too hot, the vinyl can stretch or distort and adhesive can dry up or not bond if placed in cold conditions. Besides, humidity is important since, if the level is too high, it may cause the wrap to tear or to bubble. To get better results, it is recommended to carry out your installation in a dry and well ventilated region.
Tools of the Trade for Vinyl Wrap Installation
Vinyl wrap installation also has its tools that provide a massive difference between a professional result and a rusty one. No matter whether you are a DIYer or an experienced contractor, these basic tools are used for a sleek and accurate application.
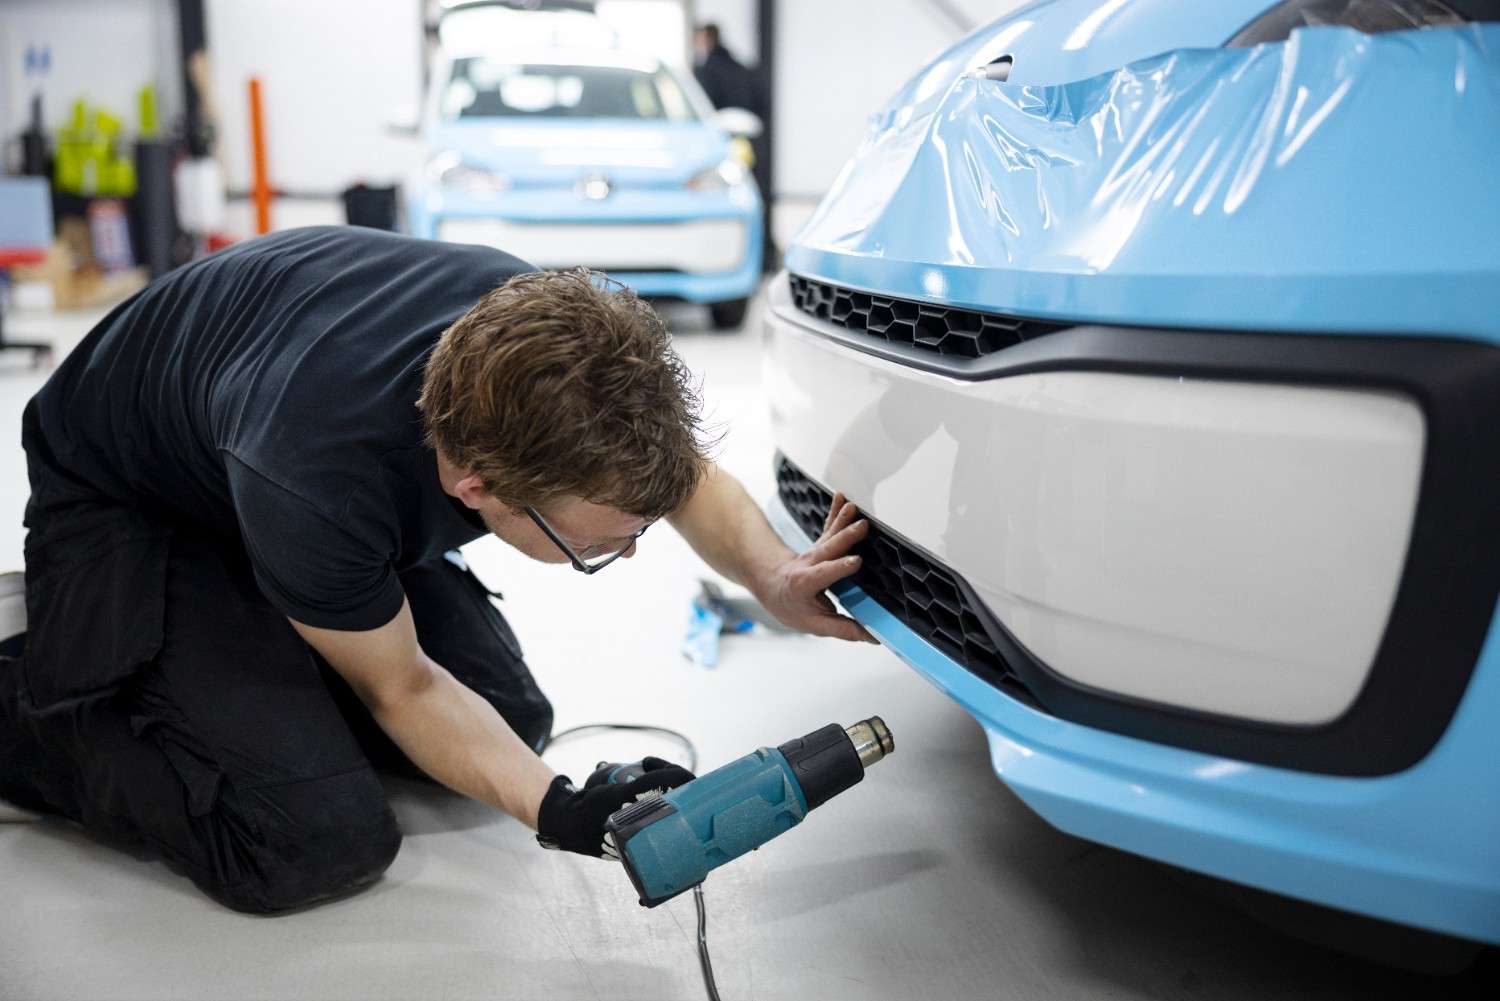
Heat Gun
A heat gun is considered to be an essential piece of equipment when it comes to making the vinyl easier to shape over the contours of your car or object. First, heat helps the vinyl to stick better and, second, there are no bubbles formed on the surface of the car. Nonetheless, you must ensure that your heat gun is washed often so that it will maintain high efficiency.
Dust and other substances that may settle on the surface of the air around the convection may hinder air flow. This ensures your heat gun has a clean nozzle and other parts to give you that efficient performance each time you are using it.
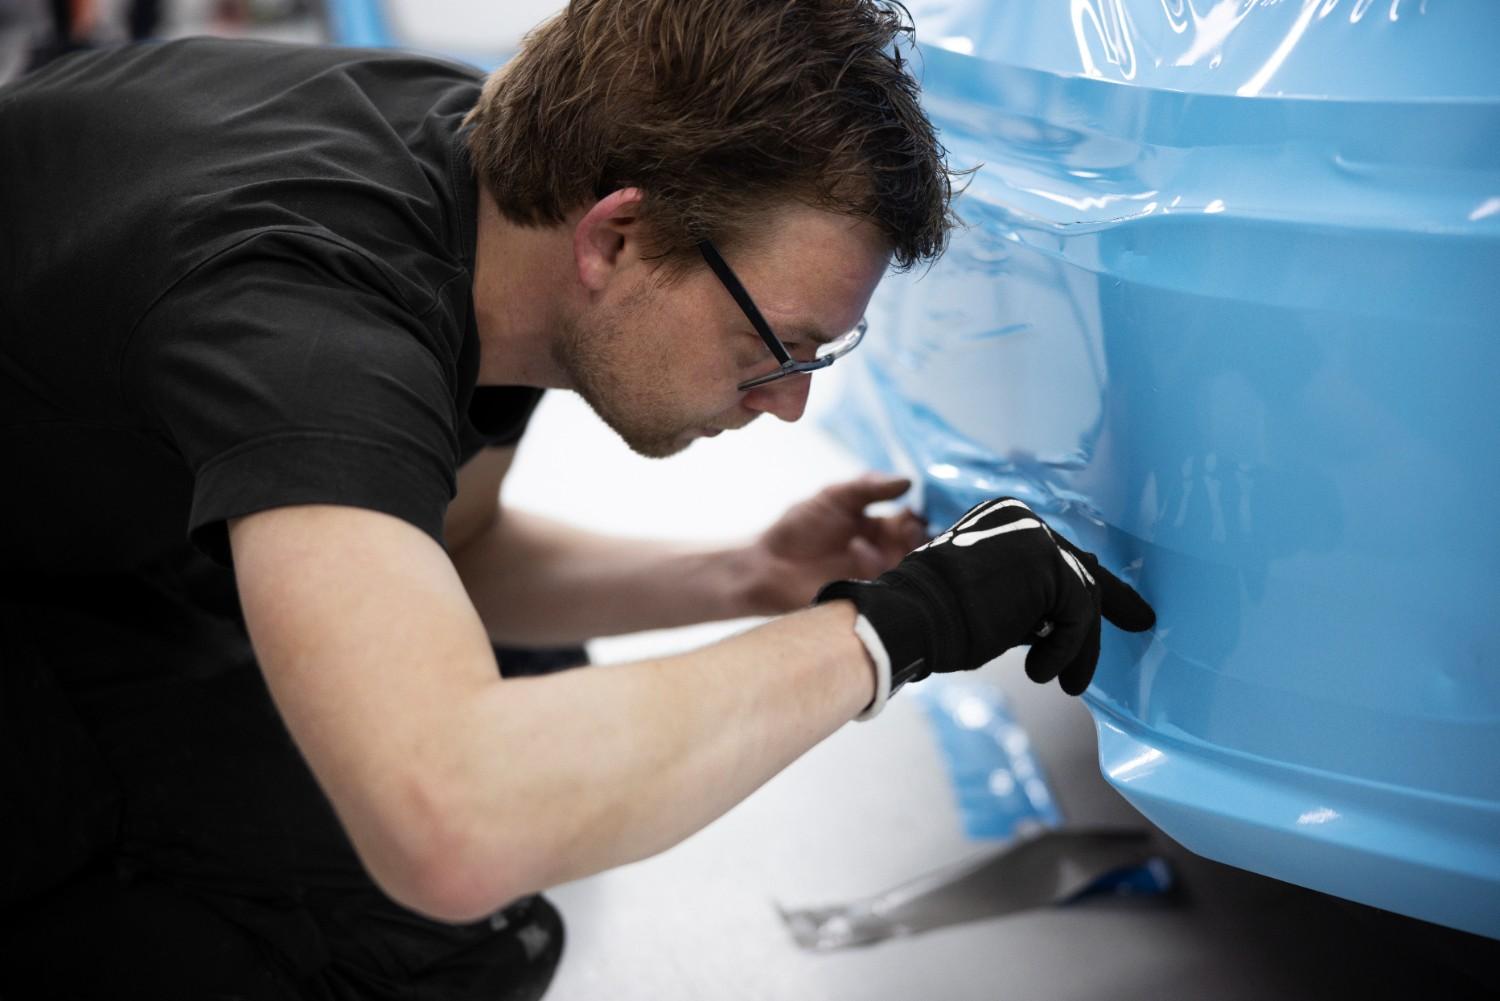
Squeegee
A squeegee is used to smooth the vinyl and push out air bubbles as you apply the wrap. It’s crucial for achieving a professional-looking finish. The tool helps you press the vinyl onto the surface, preventing wrinkles or imperfections.
Knives
A sharp utility knife or blade is necessary for trimming excess vinyl and ensuring clean edges around the corners. A dull blade can tear or damage the vinyl, so always make sure it’s sharp for precision cuts.
Vinyl Wrap Installation Guide: Mastering the Techniques
The majority of automobile owners favor vinyl wrapping for their vehicles since it allows them to customize their vehicle while also guaranteeing its protection. Even while it sounds fantastic, getting the finish just right can be difficult. In case you decide to install vinyl, it is crucial to understand how it should be performed even if you are going to hire someone to help you.
The Art of Cutting: Precision Makes a Difference
If it comes to the installation of vinyl wrap, cutting is considered to be one of the absolutely crucial stages. Using a sharp utility knife or a vinyl cutter allows you to make clean, straight cuts, preventing errors that could affect the overall finish. Make sure to measure carefully before cutting to avoid mistakes. Cutting accurately around edges and curves ensures a smooth, professional look.
Cold Pre-Stretch Technique for Perfect Corners
Corners can be tricky when applying vinyl. To avoid wrinkles or uneven stretches, use the cold pre-stretch technique. Begin by pulling the vinyl gently over the corner. Then, let it cool down before trimming. This method helps the vinyl fit better, creating clean, sharp corners with no bubbles or puckers.
Reading Wrinkles During Roof Wrapping
When wrapping the roof of a vehicle, wrinkles are common, but they can be managed. Pay attention to where the vinyl starts to wrinkle. Apply heat and gently smooth the area, working from the center outwards. This helps to avoid permanent creases and ensures a smooth, seamless finish.
Common Challenges and Solutions in Vinyl Wrap Installation
- Wrinkles and Bubbles: Use a heat gun on low settings to soften the vinyl, smooth out bubbles with a squeegee from the center outward, and gently lift and reapply the vinyl with consistent pressure if wrinkles persist.
- Dots and Adhesive Lines: Clean the surface thoroughly to remove dust and debris, apply even pressure with a felt squeegee to avoid adhesive lines, and use overlapping strokes for a smooth, gap-free finish.
- Corners and Curves: Cut the vinyl into manageable sections, apply heat sparingly to mold it gradually, and use a precision knife to trim excess cleanly.
- Air Traps on Textured Surfaces: Use air-release tools designed for vinyl application and press down firmly to expel trapped air through microchannels in the vinyl.
- Peeling Edges: Avoid stretching the vinyl too tightly around edges; instead, secure them with primer or edge sealer to maintain a clean finish.
Conclusion
Vinyl wrapping is a creative and practical way to personalize and protect vehicles, but achieving a flawless application requires attention to detail and the right approach. From preparing the surface to mastering precise cutting techniques, every step plays a crucial role in the outcome. This vinyl wrap installation guide has covered the essentials, including tools, best practices, and solutions to common challenges like wrinkles, bubbles, and peeling edges.
Regardless of whether you’re tackling a DIY project or working as a professional installer, following these vinyl wrapping tips can offer a smoother process and stunning results. With practice and patience, vinyl wrapping can deliver impressive transformations.
FAQs
Q1. What are the essential tools for vinyl wrapping?
The main tools required are a heat gun, squeegee, sharp utility knives and a vinyl cutter. These are used for stretching, smoothening, cutting and finishing especially for the requirement of a neat edge.
Q2. How do you prevent wrinkles while applying vinyl wrap?
To remove wrinkles, use a heat gun to heat the vinyl and you use a squeegee to iron the vinyl if wrinkles still persist, then you reapply the vinyl again.
Q3. Why is climate control important during wrapping?
Climate control helps to see that the vinyl sticks well to the furniture. Stress drop, peeling or bubbling do not occur when the optimal temperature range of 60°F to 80°F and humility is maintained hence yielding better outcome.
Q4. What is the best technique for wrapping corners?
The cold pre-stretch technique is best for corners. Gently stretch the vinyl over the corner, let it cool, and trim. This method helps fix wrinkles and bubbles in vinyl wrap but also guarantees sharp, clean corners.
Q5. Can beginners achieve a professional finish with vinyl wrap?
Yes, they can get the professional car wrapping through the following techniques of car wrapping; using the right tool and taking a lot of time. Even if it takes several hours, attention, concentration and hard work will guarantee a perfect result.