

When you think about vinyl wraps for your car, it's easy to focus on the bold colors and unique designs. But did you know that one of the most important steps in achieving a flawless, long-lasting wrap is post-heating? It’s the secret behind a smooth, durable finish that not only looks professional but also ensures the wrap stays in place, even in harsh weather conditions.
In this blog, we’ll walk you through the post-heating vinyl wrap process, why it’s essential, the tools you'll need, and the key techniques to avoid common mistakes. Whether you're a DIY enthusiast or a professional installer, understanding post-heat car wrap will elevate your work, ensuring you get results that last. Let’s dive in and explore why post-heating is a must for a perfect finish every time.
What Is Post-Heating in Vinyl Wrapping?
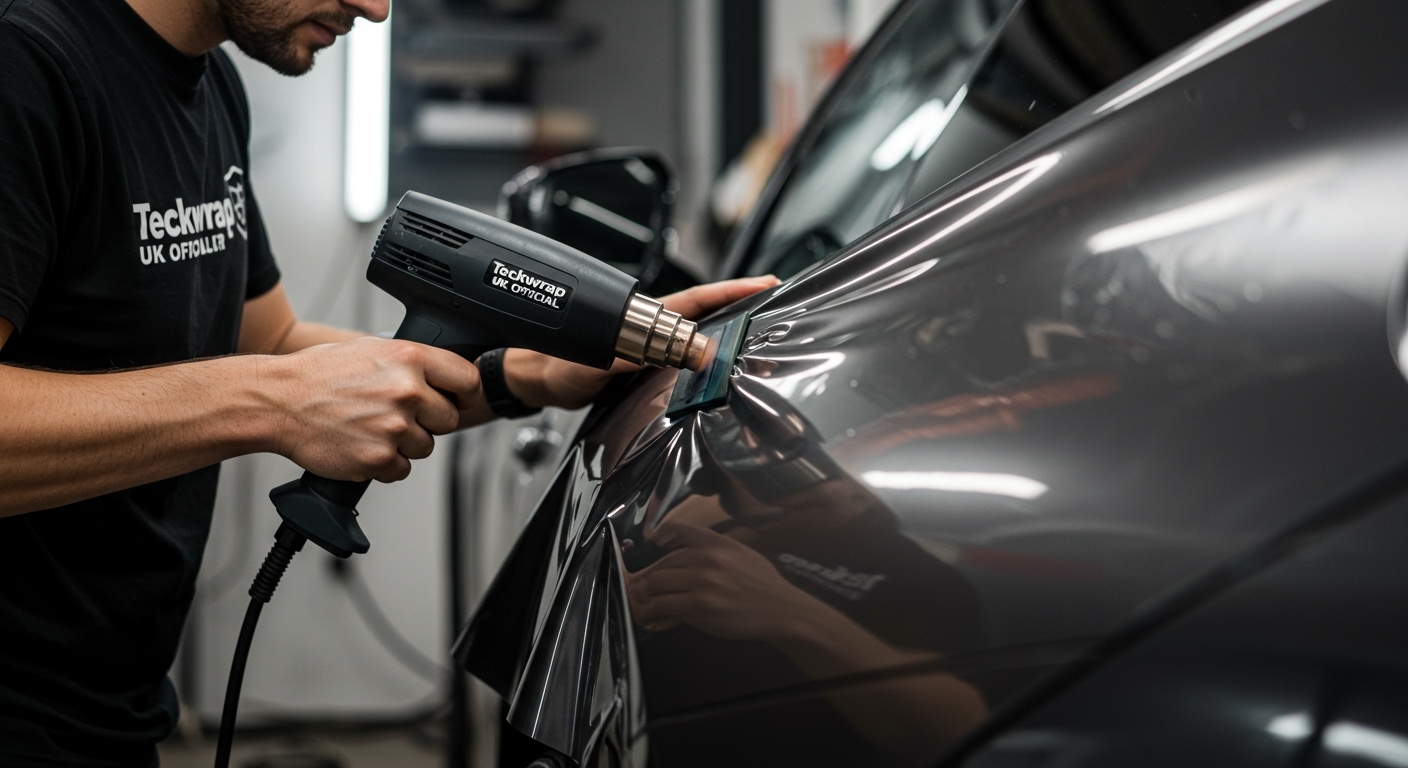
Post-heating refers to the process of applying heat to a vinyl wrap after it's been applied to the vehicle. This crucial step involves using a heat gun for car wrap to activate the adhesive and ensure the wrap adheres securely to the vehicle's surface. It's done to prevent issues such as bubbles, wrinkles, or peeling that can occur if the wrap isn’t properly heated and set.
The heat allows the vinyl to stretch and conform to the contours of the vehicle, creating a smooth, seamless finish. In essence, post-heating locks the wrap in place and ensures it will remain in place for the long term, offering durability and longevity.
Why Is Post-Heating Necessary?
The vinyl wrap adhesion process doesn’t end after the vinyl is applied. Here’s why post-heating is vital:
- Enhanced Adhesion: The heat helps activate the adhesive, ensuring a strong bond between the vinyl and the vehicle's surface. Without proper post-heating, the wrap may lift or peel over time.
- Smooth and Seamless Finish: Post-heating ensures that the vinyl conforms perfectly to the vehicle's curves, eliminating air bubbles, wrinkles, or unevenness.
- Increased Durability: By ensuring proper adhesion, post-heating makes the vinyl more resistant to wear and tear, UV rays, and other environmental factors.
- Longevity: When the wrap is post-heated correctly, it will last longer, staying vibrant and intact for years, even under harsh weather conditions.
What Tools Are Required?
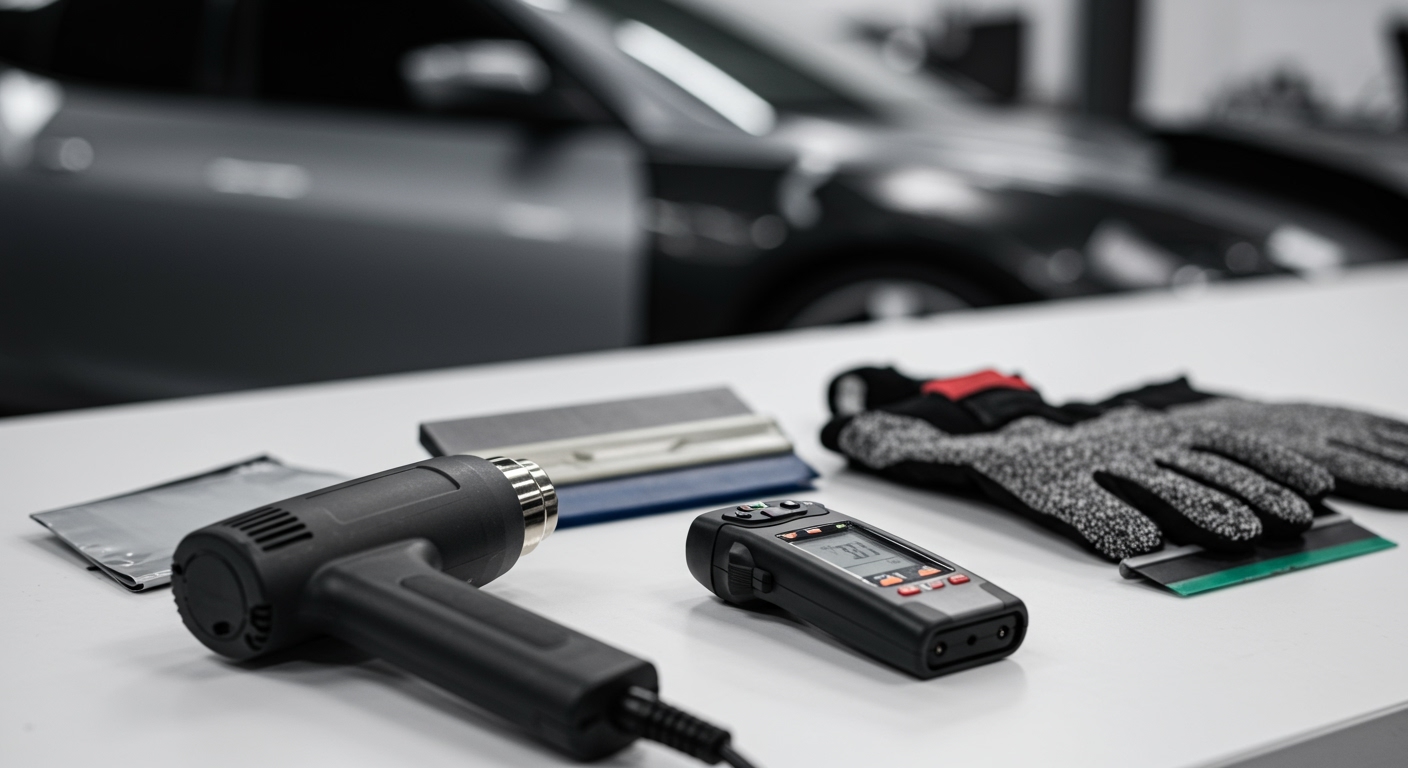
To achieve the perfect post-heating, you'll need the right tools. Here's what you'll need:
- Vinyl Wrap Heat Gun: A quality heat gun is essential for applying controlled heat. It allows you to adjust the temperature to prevent damage to the vinyl.
- Heat-Resistant Gloves: Protect your hands when working with high temperatures.
- Squeegee or Applicator: To smooth out the wrap as you apply heat, ensuring no air bubbles or wrinkles remain.
- Infrared Thermometer: To measure the exact temperature and ensure you’re applying the right amount of heat.
Using the proper tools will make a significant difference in achieving a flawless, professional finish.
Correct Temperatures for Post Heating
Knowing the correct temperature is critical to getting a perfect wrap. Too much heat can damage the vinyl, while too little won’t activate the adhesive properly.
- Optimal Temperature Range: The ideal temperature for post-heating vinyl is between 180°F and 200°F (82°C to 93°C). This range ensures that the vinyl stretches and adheres properly without causing damage.
- Using a Heat Gun: Start by holding the heat gun a few inches away from the vinyl. Keep the nozzle moving constantly to avoid overheating one spot.
- Check with a Thermometer: To be sure you’re in the right temperature range, use an infrared thermometer to check the surface temperature of the vinyl.
Areas to Focus on During Post-Heating
When performing post-heating, focus on these key areas to ensure a perfect finish:
- Edges and Corners: These areas are most likely to lift or wrinkle, so make sure you apply extra heat to ensure proper adhesion.
- High-Contact Areas: Pay attention to spots where the vinyl is stretched the most, such as around curves, seams, and body lines.
- Large Flat Sections: While large areas might seem straightforward, they can still develop air pockets or uneven surfaces. Make sure to apply heat evenly.
Taking extra care with these areas ensures the vinyl stays smooth and adheres properly.
Step-by-Step Post-Heating Process
Now that you know the basics, here's a step-by-step guide to the post-heating technique:
- Prep the Vehicle: After applying the vinyl wrap, allow it to cool for a few minutes before beginning the post-heating process. Ensure the surface is clean and free of dust.
- Set the Heat Gun: Turn on the vinyl wrap heat gun and adjust the temperature to between 180°F and 200°F.
- Start from One Side: Begin heating at one end of the wrap, holding the heat gun about 2-3 inches from the vinyl. Move the gun slowly to distribute the heat evenly.
- Smooth and Press: As you heat the vinyl, use a squeegee to press the vinyl into the vehicle's surface, working from the center outwards to remove any air bubbles.
- Focus on Challenging Areas: Spend extra time on corners, seams, and edges to ensure that the vinyl is fully secured.
- Final Check: Once you’ve completed the post-heating, inspect the wrap for any areas that might need additional heat or smoothing.
Common Mistakes to Avoid
When it comes to vinyl wrap installation, a few common mistakes can affect the final results:
- Overheating: Applying too much heat can cause the vinyl to shrink or warp, leaving a less-than-perfect finish.
- Not Applying Enough Heat: Insufficient heating may result in the vinyl not sticking properly, leading to peeling or lifting.
- Uneven Heating: Applying heat unevenly can lead to wrinkles or air pockets, so make sure to keep the heat gun moving and maintain a consistent distance.
Avoiding these mistakes is essential to ensure your post-heat car wrap looks flawless.
Pro Tips & Tricks
Here are some additional post-heating tips to achieve the best results:
- Work in Sections: If you’re new to post heating, break down the process into manageable sections. This will help you control the application of heat and reduce the chances of mistakes.
- Use Controlled Heat: For intricate designs or small areas, use a lower heat setting and work slowly to ensure the vinyl adheres well.
- Stay Consistent: Apply heat consistently, especially around curves or edges, to prevent any areas from lifting or peeling.
Takeaways
Post-heating is a crucial step in the vinyl wrap installation process. By ensuring proper heat application, you can achieve a smooth, durable, and long-lasting wrap that looks professionally done. Whether you’re working on a car wrap or a custom project, following the right post-heating technique will make all the difference.
Remember, the key to a flawless wrap is understanding the post-heat car wrap process, using the right tools, and paying attention to detail. Don’t rush, take your time, and your results will speak for themselves!
Ready to take your vinyl wrap installation skills to the next level? Explore our expert services at TeckWrap UK or check out our portfolio for more professional tips and tricks on creating flawless wraps.